1. Static Webpage
Let me explain how I created this website. Firstly, this website is a static webpage, but what does static mean?
A static webpage is a website that is not generated dynamically, but rather is pre-generated and served as-is to the user. This means that the content of the website does not change based on user input or other factors, and it is typically faster and more secure than dynamic websites.
Ok so now you know what a static webpage is, but are there any benefits of using a static webpage? Yes, there are many benefits of using a static site, including:
- Speed: Static websites are typically faster to load than dynamic webpages, as they do not require server-side processing or database queries.
- Cost: Static websites are often cheaper to host than dynamic webpages, as they do not require a server with a database or server-side scripting capabilities.
- Simplicity: Static websites are easier to create and maintain than dynamic webpages, as they do not require complex server-side programming or database management.
2. Hugo
But how do you create a static webpage? There are many ways to create a static site, but I will explain how I created this website using Hugo and Hugo Profile.
Hugo is a framework for building static sites quickly and easily. It is written in Go and is known for its speed and flexibility.
Firstly, you need to install Hugo. You can do this by following the instructions on the Hugo installation page. I am using Fedora, so I installed Hugo with this command:
sudo dnf install hugo
Then you can create a new Hugo site with this command:
hugo new site <site-name>
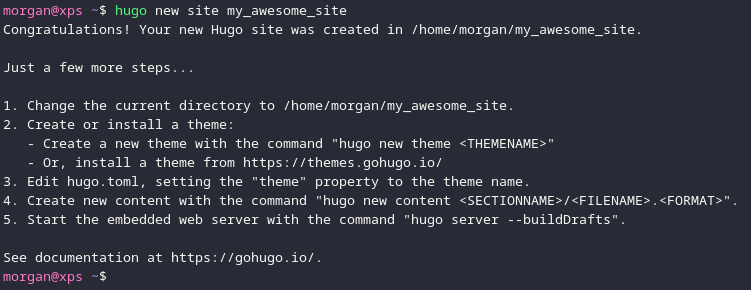
This will create a new directory with the name you specified, and it will contain the basic structure of a Hugo site. Additionally, I used the --format=yaml option to create the configuration file in YAML format. You can also use TOML or JSON, but I prefer YAML because I am more familiar with it.
3. Hugo Profile
After creating the site, you need to add a theme. I used Hugo Profile. To add the theme, you need to clone the theme repository into the themes directory of your Hugo site. You can do this with the following command:
git clone https://github.com/gurusabarish/hugo-profile.git themes/hugo-profile
After that to speed things up I copied the hugo.yaml file from the theme to the root of my site. This file contains the configuration for the Hugo and the theme itself, and it is used by Hugo to generate the site.
There are few things that you need to change in the hugo.yaml file. Firstly, you need to change the baseURL to the URL of your website. You can also change the title, description, and other settings to customize your site.
I don’t want to go into too much details about the configuration file, because I don’t want to create a tutorial about “How to create Hugo webpage”. Instead, I want to explain how I created this exact website from more technical and hosting point of view.
4. Hosting
After creating the site, you need to host it. There are many ways to host a static website. The easiest way is to use a GitHub Pages. You can create a new repository on GitHub, push your Hugo site to the repository, and then enable GitHub Pages in the repository settings. This allows you to serve your static website directly from GitHub.
I didn’t want to use GitHub Pages, because I wanted to host my website under my own domain. So I decided to use Oracle Cloud with Cloudflare.
4.1. Oracle Cloud
Oracle Cloud is a cloud computing service that offers a wide range of services, including virtual machines, storage, and networking. It is free to use for the first 30 days, and it offers a free tier with limited resources.
You can create VM on Oracle Cloud manually, using the web interface, but I wanted to automate the process, so I used OpenTofu to create the VM. OpenTofu is a fork of Terraform, and it allows you to create and manage cloud resources using code.

To use OpenTofu, you need to install it first. You can do this by following the instructions on the OpenTofu installation page. I am using Fedora, so I installed OpenTofu with this command:
sudo dnf install opentofu
After that, you need to create a configuration file for OpenTofu. This file contains the configuration for the VM, including the image, shape, and networking settings. You can find an example configuration file in the Oracle Provider documentation. Creating every resource manually is a bit tedious, but you can use module created by Oracle to create the VM. Module is, let’s say, a template for creating resources.
module "instance" {
  source                      = "oracle-terraform-modules/compute-instance/oci"
  ad_number                   = 1
  instance_count              = 1
  compartment_ocid            = sensitive(local.secrets.oci_tenancy_ocid)
  instance_display_name       = local.oracle.vm.name
  source_ocid                 = local.oracle.vm.boot_img_ocid
  subnet_ocids                = [data.oci_core_subnet.hosting_subnet.id]
  public_ip                   = "NONE"
  ssh_public_keys             = fileexists("~/.ssh/id_rsa.pub") ? file("~/.ssh/id_rsa.pub") : file("~/.ssh/id_ed25519.pub")
  block_storage_sizes_in_gbs  = [local.oracle.vm.storage_size]
  boot_volume_size_in_gbs     = local.oracle.vm.storage_size
  shape                       = local.oracle.vm.shape
  instance_state              = "RUNNING"
  boot_volume_backup_policy   = "disabled"
  user_data = base64encode(templatefile("${path.module}/${local.oracle.vm.name}/cloud-init.yaml.tpl", {}))
}
This is part of the configuration file that I use to create the VM, let’s go through it step by step:
source: Where to find the module. In this case, it is the Oracle module for creating a VM.ad_number: This is the availability domain number, in this case it is 1. You can find the availability domain number in the Oracle Cloud console.compartment_id: Compartment is a logical container for your resources. You can create compartments in the Oracle Cloud console and also find its ID there.instance_display_name: VM name visible in the Oracle. I set it tolocal.oracle.vm.name, which is defined in thelocalsblock. You can set it to any name you want.source_ocid: This is the ID of the image that you want to use for the VM. Let’s say it is like an ISO image for the VM. You can find the image ID in the Oracle Cloud console.subnet_ocids: Here you need to specify the subnet ID. Multiple subnets can be specified, but in my case I only have one subnet. You can find the subnet ID in the Oracle Cloud console.public_ip: Here you can specify if you want to create a public IP address for the VM. I set it toNONE, because I will assign the public IP later.ssh_public_keys: This is the public SSH key that you want to use to connect to the VM. Without this key you won’t be able to connect to the VM.block_storage_size_in_gbs: This is the size of the “disk” that you want to use for the VM. You can attach multiple disks to the VM.boot_volume_size_in_gbs: If the previous option is the size of the “disk”, this is the size of the “boot partition”.shape: It is a specific name for “this many cores and this much RAM”. You can find the shape name in the Oracle Cloud console.instance_state: Here you can specify if you want to create the VM in a stopped state or running state. I set it toRUNNING, because I want to use the VM right after it is created.boot_volume_backup_policy: Here you can specify if you want to create a backup policy for the boot volume. I set it todisabled, because I don’t need it.user_data: This point will be explained later, but this is the script that will be executed when the VM is created. You can use it to install software, configure the VM, etc.
4.1.1. User data
The user data is a cloud-init file that is executed when the VM is created. In cloud-init file you can define if you want to update the system packages during the first boot, install additional packages, format, and mount additional disks, and create scripts that will be executed after the first boot.
I used the cloud-init file to mount the additional block storage to my VM. This block storage is independent of the VM, so it will be preserved even if the VM is deleted. This allows me to replace the VM without losing the data. After that I install Docker and download docker-compose file from repository where I defined the services that I want to run on the VM.
Here comes handy the additional block storage. I used it to store the Docker volumes, so if I need to replace the VM, I can just attach the block storage to the new VM and all the data will be preserved.
fs_setup:
  - label: data_volume
    device: /dev/oracleoci/oraclevdz
    filesystem: ext4
    overwrite: false

mounts:
  - [ /dev/oracleoci/oraclevdz, /mnt/data, ext4, "defaults,noatime", "0", "2" ]
I used fs_setup option to format the block storage. It is important to set overwrite: false as this will prevent the block storage from being formatted again if it is already formatted. Then I mounted the block storage to /mnt/data directory.
After that I created script file in /usr/local/bin directory.
write_files:
  - path: /usr/local/bin/init.sh
    permissions: '0755'
    content: |
      #!/bin/bash
      set -xe

      curl -s -X POST "https://api.telegram.org/bot${telegram_bot_token}/sendMessage" \
        -d "chat_id=${telegram_chat_id}&text=The init script has started on $HOSTNAME."

      START_TIME=$(date +%s)

      apt update -y && apt upgrade -y
I am using Telegram Bot API to send messages from the script. This allows me to receive notifications about the status of the VM and errors that occur during the creation process. After performing apt update && apt upgrade, I installed Docker and Docker Compose using commands from the official Docker documentation.
Init script is executed by the init.service I created. This service executed the script only once, when the VM is created, and not at every start of the VM.
  - path: /etc/systemd/system/init.service
    permissions: '0644'
    content: |
      [Unit]
      Description=Init script
      After=network.target

      [Service]
      Type=oneshot
      ExecStart=/usr/local/bin/init.sh
      RemainAfterExit=true

      [Install]
      WantedBy=multi-user.target
4.2. GitHub Actions
After creating the VM, I needed to deploy the website. But how you can do this? You could run hugo command on your local machine and then copy necessary files to the VM with scp or similar, but this is not very convenient. Instead, I used GitHub Actions to automate the deployment process. I created a workflow that is triggered every time I push changes to the repository. This workflow builds the website and deploys it to the VM using SSH.
First step in the workflow is to set up SSH keys, that are used to connect to the VM. I created SSH key pair using ssh-keygen command and added the public key to the ~/.ssh/authorized_keys file on the VM. The private key is stored in the GitHub repository secrets, so it is not exposed to the public.
Second step is simple, you need to install Hugo on the GitHub Actions runner. There are many already created actions for this, that you can find on the GitHub Marketplace. But most of them deploy the website to the GitHub Pages, so I created my own action that installs Hugo on the runner.
Next step is also simple, checkout code from the repository. In this step you can use actions/checkout.
Another step is to build the website. This step uses the hugo --gc --minify --cleanDestinationDir command to generate the static files for the website. Options --gc and --minify are used to remove unused files and minify the generated files. Option --cleanDestinationDir is used to remove all files from the destination directory before generating the new files. This ensures that only the files that are needed for the website are present in the destination directory.
Last step is to deploy the website to the VM. This step uses rsync command to copy the files from the local machine to the VM. The -avz options are used to copy files recursively, preserve file permissions, and compress the files during transfer. Option --delete is used to delete files on the VM that are not present in the local directory. This ensures that only the files that are needed for the website are present on the VM. I use --exclude option to exclude the .git directory from the transfer, theoretically it is not needed, but I prefer to exclude it just in case. At the end I use ssh command to restart the Nginx service, so the changes are applied immediately.
jobs:
  deploy:
    runs-on: ubuntu-latest

    steps:
      - name: Setup SSH keys
        run: |
          mkdir -p ~/.ssh && touch ~/.ssh/id_rsa
          cat <<EOF > ~/.ssh/id_rsa
          ${{ secrets.SSH_PRIVATE_KEY }}
          EOF

          chmod 400 ~/.ssh/id_rsa

      - name: Install Hugo
        run: |
          sudo apt update && sudo apt install -y hugo

      - name: Checkout code
        uses: actions/checkout@v2

      - name: Build Hugo site
        run: |
          hugo --gc --minify --cleanDestinationDir

      - name: Deploy to VM
        run: |
          ssh -o StrictHostKeyChecking=no ${{ secrets.SSH_USER }}@${{ secrets.SSH_HOST }} "uname -a"
          rsync -avz --delete --exclude '.git*' public/* ${{ secrets.SSH_USER }}@${{ secrets.SSH_HOST }}:${{ secrets.SSH_PATH }}
          ssh -o StrictHostKeyChecking=no ${{ secrets.SSH_USER }}@${{ secrets.SSH_HOST }} "sudo docker restart nginx"
4.3. Cloudflare
I use Cloudflare to manage my domain and DNS records. I don’t have public IP so most services I host using Cloudflare tunnel. This allows me to access my services using a domain name, without having public IP and port forwarding. You can assign public IP to the VM and host it that way, but I choose not too just to stick to the same methodology I used for other services.
I created the tunnel manually using the Cloudflare web interface, I didn’t find straight answer if this can be done using OpenTofu. Probably yes, but it is not obvious.
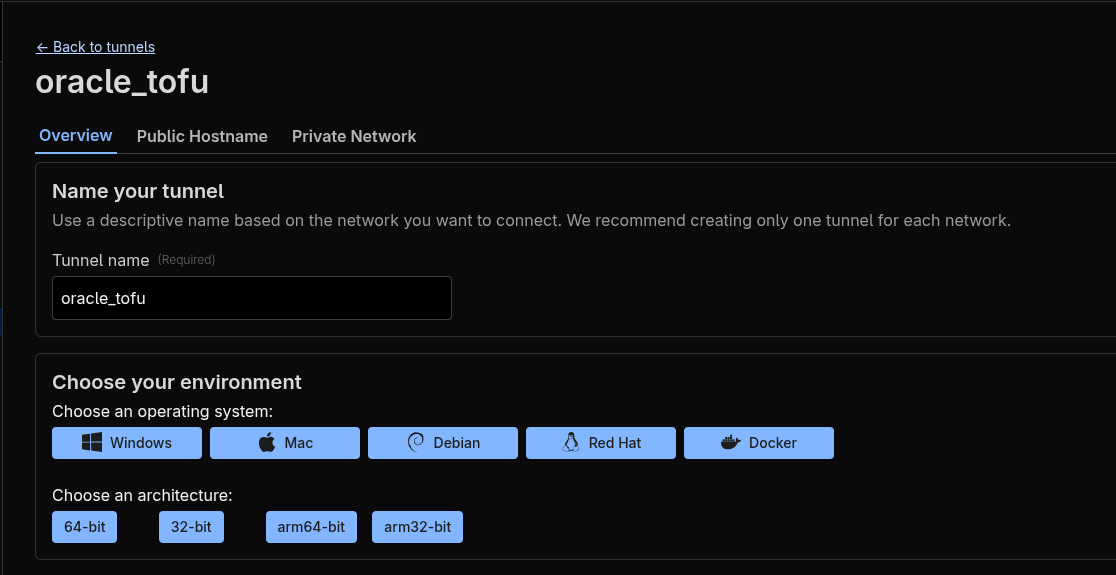
After creating the tunnel, you need to run cloudflared service on the VM. This service is responsible for establishing the connection between the VM and Cloudflare. You can find prepared commands for various systems at the tunnel creation page. I used Docker to run the service, so I added appropriate entry to the docker-compose.yml file.
  cloudflared:
    image: cloudflare/cloudflared:latest
    container_name: cloudflared
    restart: unless-stopped
    command: tunnel run
    environment:
      - TUNNEL_TOKEN=${CLOUDFLARE_TUNNEL_TOKEN}
You need to set the CLOUDFLARE_TUNNEL_TOKEN environment variable to the token that you received when you created the tunnel. This token is used to authenticate the connection between the VM and Cloudflare.
Fortunately, rest of the steps needed to host the website are possible to do using OpenTofu. I used provider for Cloudflare to create the DNS records and also needed entries in tunnel configuration. You can find the provider here.
I created my own module for creating the DNS records. This module creates needed DNS records for my domain and as an output it returns the tunnel configuration for that record, that I just need to copy to the tunnel configuration resource.
module "cf_info_webpage" {
  source = "git::ssh://[email protected]/MorganMLGman/Tofu_Modules.git//cloudflare_tunnel_simple"

  cf_domain = var.cf_domain
  cf_account_id = sensitive(local.secrets.cf_account_id)
  cf_tunnel_id = sensitive(local.secrets.oracle_cf_tunnel_id)
  cf_zone_id = sensitive(local.secrets.cf_zone_id)
  cf_subdomain = "info"
  service = "http://nginx:80"
}

resource "cloudflare_zero_trust_tunnel_cloudflared_config" "oracle_tofu_config" {
  account_id = sensitive(local.secrets.cf_account_id)
  tunnel_id  = sensitive(local.secrets.oracle_cf_tunnel_id)
  config = {
    ingress = [
      {
        hostname = module.cf_info_webpage.cf_tunnel_config_hostname
        service  = module.cf_info_webpage.cf_tunnel_config_service
      },
      {
        service = "http_status:404"
      }
    ]
  }
}
In cf_subdomain variable you need to specify the subdomain that you want to use for the tunnel. In my case it is info. For service variable you need to specify the service that you want to expose using the tunnel. Here I used http://nginx:80, because I am using Nginx to serve the website.
Then in the cloudflare_zero_trust_tunnel_cloudflared_config resource you need to specify the ingress rules for the tunnel. First rule is used to route traffic to the service, the second rule returns 404 error for all other requests.
5. Conclusion
Now you know how I created this website. I used Hugo to create a static website, Oracle Cloud to host the website, and Cloudflare to manage the domain and DNS records. I used OpenTofu to automate the process of creating the VM and deploying the website. Furthermore, I also used GitHub Actions to automate the deployment process. There are many other ways to create a static website, but this is the way I chose. Also, there are many places where I could improve the process, but I am happy with the current state. Thank you for reading this article, I hope you found it useful. If you have any questions or suggestions, feel free to contact me.
You can find the complete code for this website on my GitHub page.